

I shall be sharing a comprehensive guide for upgrading your existing vRealize Automation 7.3 to 7.4
Let's start by describing my environment. I have setup a 3 node vRealize Automation distributed deployment.
Environment
vRealize Automation Appliances ( using an embedded vRO )
vraapp01.pslab.org, vraapp02.pslab.org and vraapp03.pslab.org
IAAS Nodes
iaas01.pslab.org : Database , Website , ModelManagerData , ModelManagerWeb , ManagerService , ManagementAgent , DemOrchestrator and WAPI
iaas02.pslab.org : Website, ModelManagerWeb , ManagerService , ManagementAgent , DemOrchestrator and WAPI
iaas03.pslab.org : Management Agent , DEMWorker and vSphereAgent
iaas04.pslab.org : Management Agent, DEMWorker and vSphereAgent
lb aliases
vRA : vrava-lb.pslab.org
IaaS Web : iaasweb-lb
IaaS Manager : iaasmgr-lb
Health-checks before upgrade
You have to ensure environment is healthy before you start an upgrade of your infrastructure
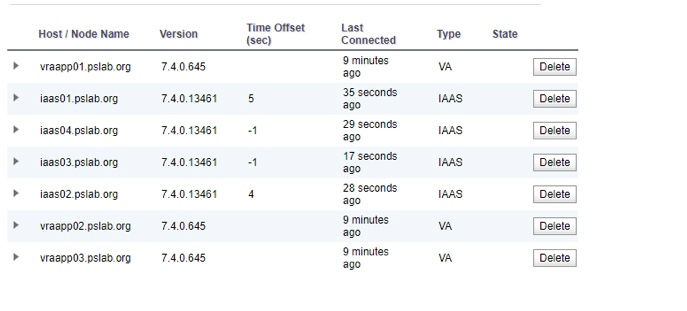
1. Let's start by checking cluster "Last Connected" status, This IaaS nodes should have last connected time not more than 30 seconds. Appliances should not be more than 10 minutes.
Take an ssh to Master/any other vRA appliance and then execute following command
vcac-config cluster-config -list | sed -e 's/[{}]/''/g' | awk -v k="text" '{n=split($0,a,","); for (i=1; i<=n; i++) print a[i]}' | grep -E 'nodeHost|lastUpdateRelative'
This is how it's output would like

2. Verify if rabbitmq cluster status is intact by running below command
rabbitmqctl cluster_status
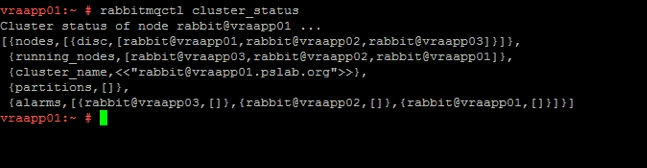
Ensure all three vRA appliances are available under running_nodes section
cluster_name is set to current MASTER node and there are no partitions ( should be blank as above )
3. Verify IaaS service hosted in Microsoft IIS is running
Start browser and enter URL https://webhostname/Repository/Data/MetaModel.svc to verify that Web Repository is running. If successful , no errors are returned and you see a list of models in XML format


Log in to the IaaS Website and check that the status recorded in the Repository.log file reports OK. The file is located in the VCAC home folder at /Server/Model Manager Web/Logs/Repository.log
iaas01
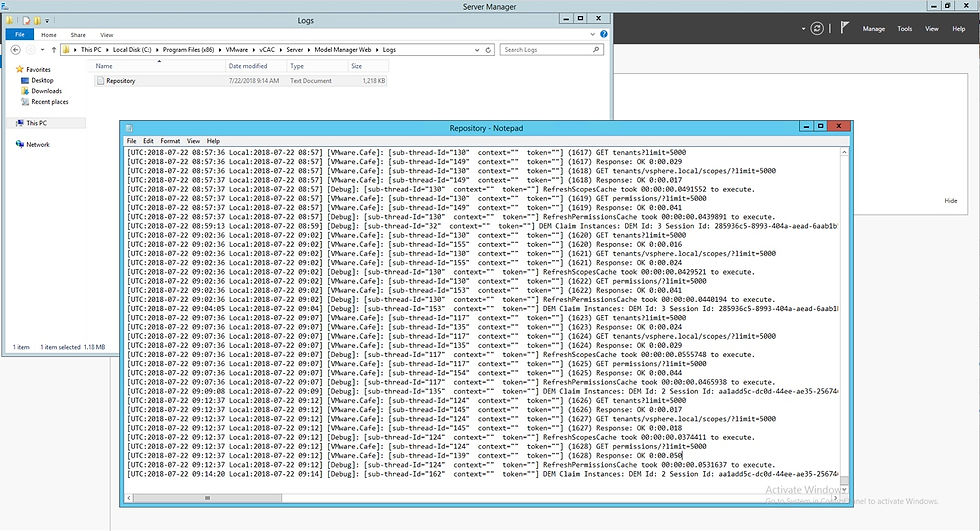
iaas02

Start browser and enter url https://IaaS-Web-FQDN/WAPI/api/status/web , the service must be "REGISTERED" in the output


Verify Iaas Manager Service https://IaaS-Mgr-FQDN/VMPS2Proxy

4. Ensure all Prerequisites for upgrade vRealize Automation are met
5. Follow Checklist religiously
Run NSX and Security Data collection
Backup existing vRA environment ( It's a MUST )
Change database replication mode to "ASYNCHRONOUS" to disable automatic failover
Download vRealize Automation updates from repository or use iso image
Disable Load balancer
Note : In my environment, I have configured NSX Load-balancers. I have it disabled at the moment , see the below screenshot
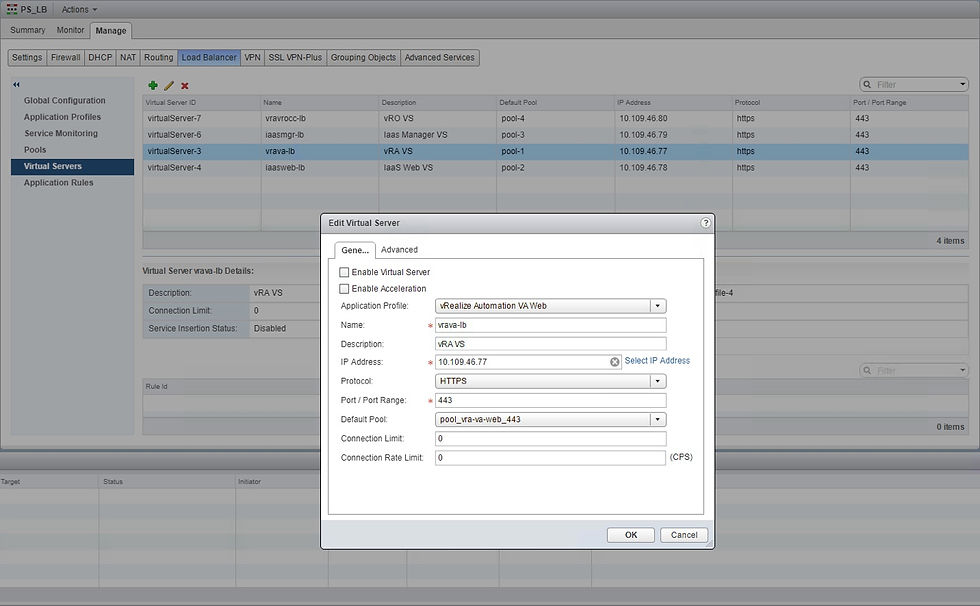
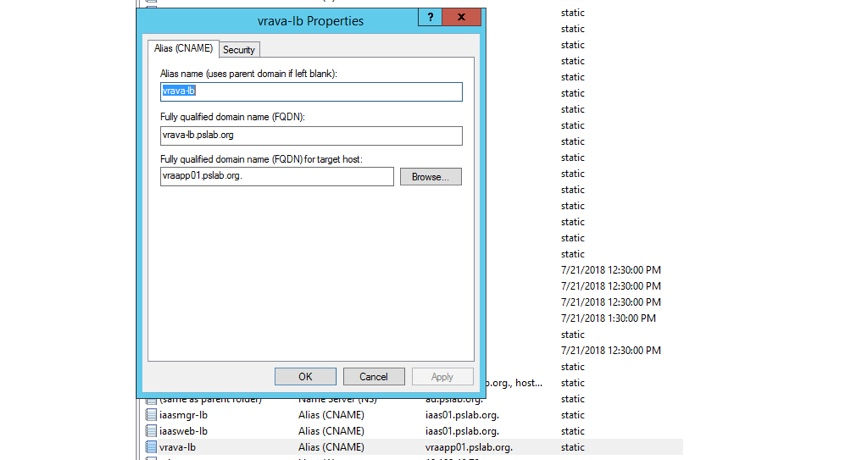
and I am using CNAMES in AD for LB purposes till upgrade is complete. These would be pointing to the primary node
6. Backup vRA database ( vPostgres ) by following KB
7. Backup IAAS database (SQL) with the help of your DBA
Download vRealize Automation 7.4 update repository from VMware Downloads
Note : Take snapshots before you upgrade , Ensure there are no In-Progress or Stuck request. If there are any then wait till they finished or clean them up
Let's kick off upgrade now. We will be performing an upgrade with IAAS nodes inclusive or excluding IAAS nodes
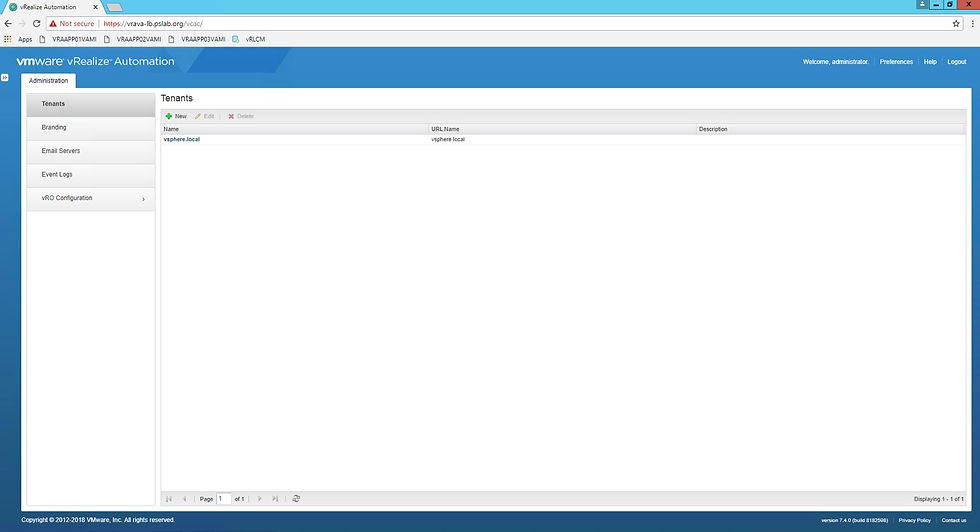
Identify your current Master node among all three appliances and mount ISO image to it
In my case it was vraapp01.pslab.org as seen in the screenshot below


Now go back to VAMI and under Update tab change Settings to Use CD-Rom updates and click on Save Settings

Now go back to Status tab under Update and click on Check Updates. Appliance should detect the ISO mapped to it and then show it under Available Updates
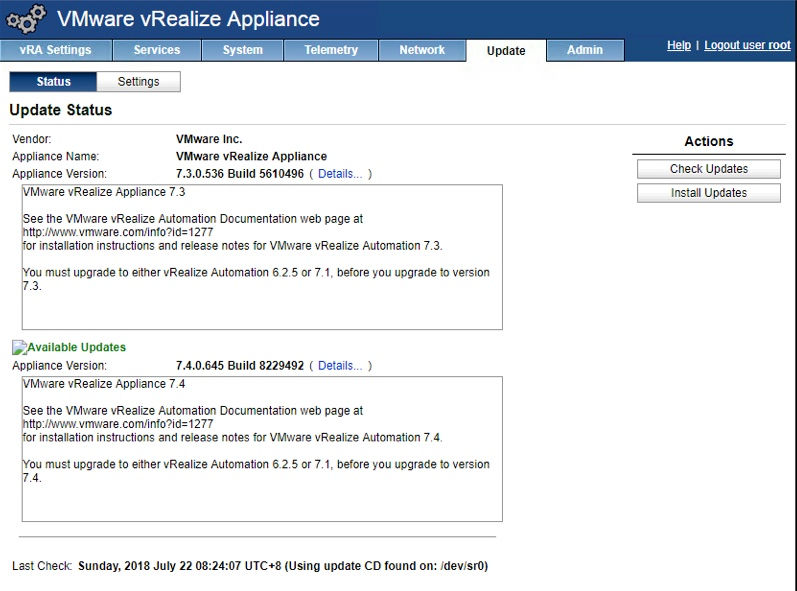
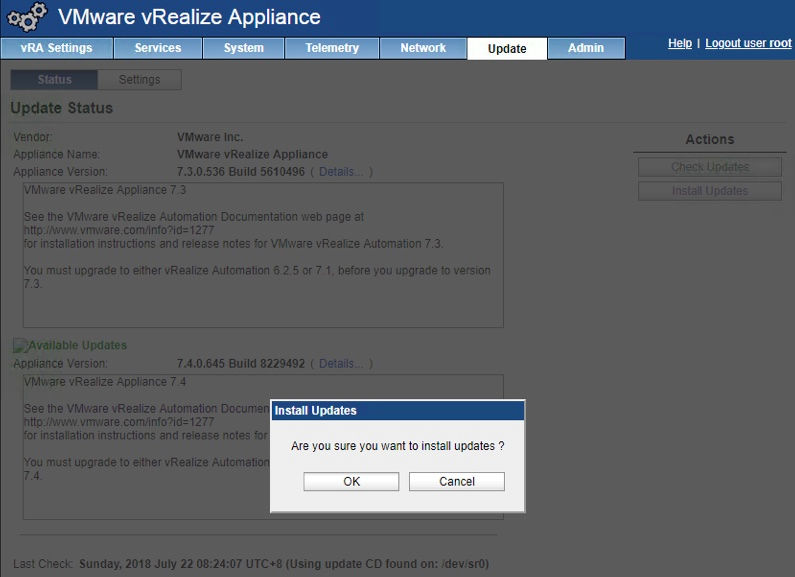
Now that we have everything ready let's press Install Updates and start the process

Under /opt/vmware/var/log/vami/ we can see that the installation is proceeding in background once it started

installer-page.log is something we can monitor while this upgrade is in progress , it's available under
/opt/vmware/var/log/vami/
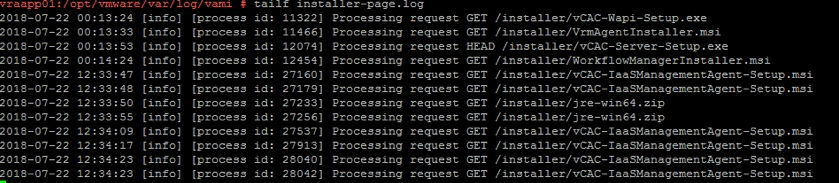
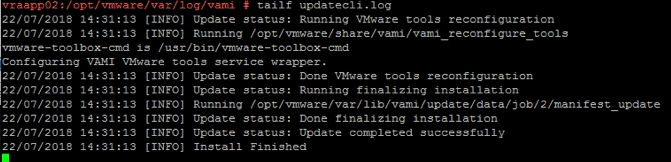
Another log to monitor is updatecli.log under same path

For a change upgrade did fail on second node ( vrapp02.pslab.org ) , it did upgrade Master ( vraapp02.pslab.org ) and third node ( vraapp03.pslab.org )
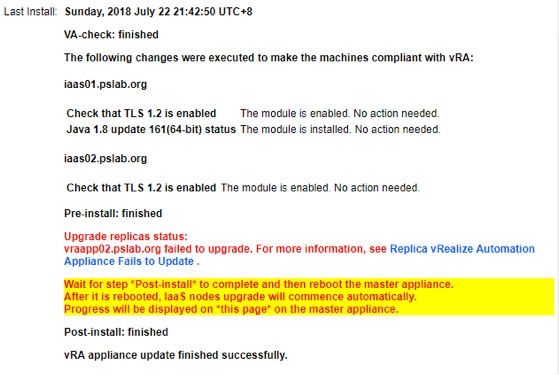
As stated under this document reverted the snapshot and updated iso image and started upgrade on this node , vraapp02.pslab.org again
After a while , even this node upgrade is now complete
Then verified that all nodes were in cluster

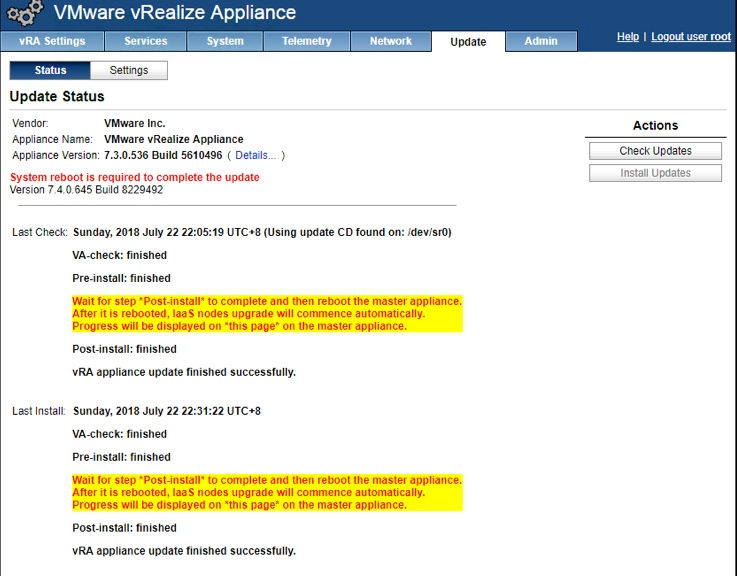
After verifying cluster status , went ahead and executed reboot on the master node

As stated in the documentation , rebooting MASTER will automatically reboot it's peers

As soon as MASTER node is back after rebooting it's peers and all services are started , we would see IAAS upgrade being kicked off.
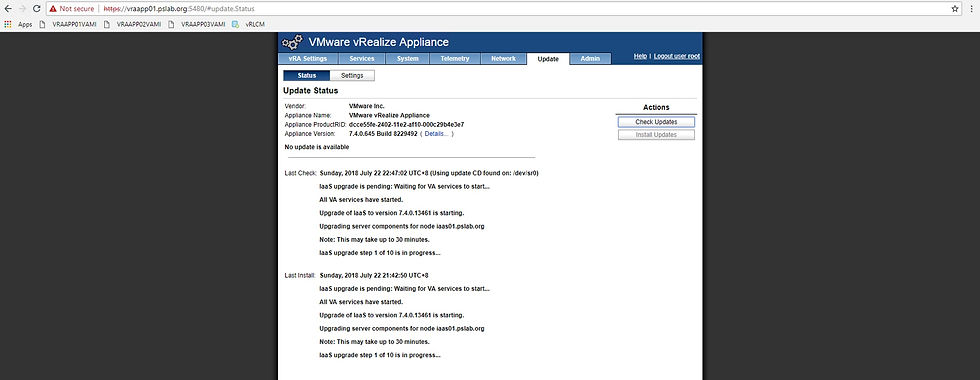
Above information can be reviewed in /opt/vmware/var/log/vami/upgrade-iaas.log as well
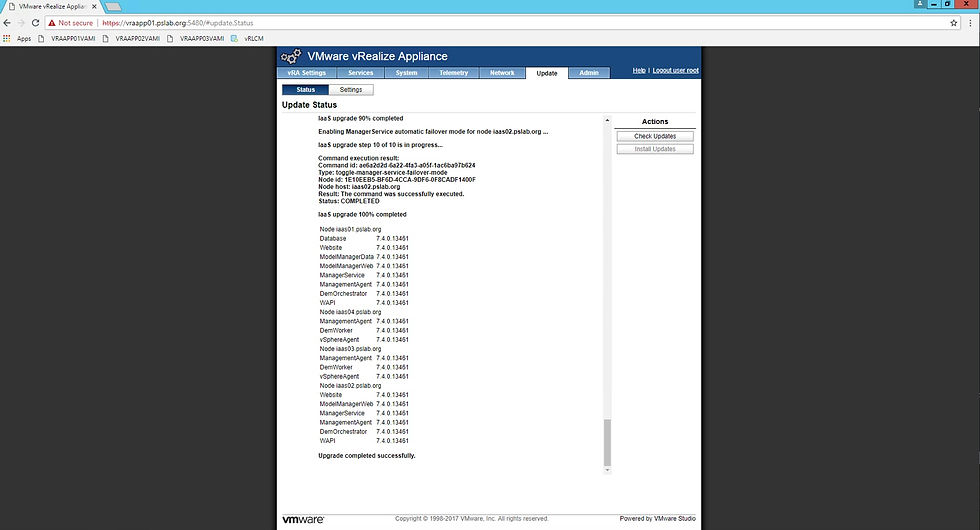
As stated earlier all of the upgrade were going as expected

Finally , it states that the upgrade is now complete
Now that the upgrade is complete , let's perform a quick health check
Last Connected status looks good
Services on all of the nodes were registered as expected. So no failures observed here. I am showing only the MASTER node screenshot below.

Performed checks on IAAS as well , all of them passed with flying colors

No Errors in repository.log as well. Since every check has now been cleared.
Now it's time to enable NSX load-balancer back . As a first step, I would go ahead and remove the CNAMES configured on my AD

Re-create entries for your LB VIP's

Let's go back to NSX and enable virtual servers

Once we enable virtual servers , we see pool and member status changed to UP as well. Which is what we look for

Once all the checks from LB perspective are now completed. It's time to login into vRA 7.4 . As you can see we are using LB VIP , not a individual node anymore.

That's it. This concludes article on upgrading your vRealize Automation to 7.4
Leave your feedback and do not hesitate to ask questions.
!!! Happy Learning !!!